Validate Data in Cells
The Spreadsheet allows you to use data validation to impose restrictions on cells to prevent other users from entering incorrect values in validated cells. For example, you can create a drop-down list of allowed values, restrict the number of characters entered into a cell, validate data using spreadsheet formulas, display an error message, provide an input message explaining what values can be entered into cells, etc.
Data validation settings are located on the Data tab in the Data Tools group.
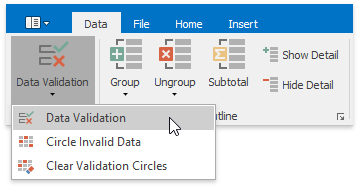
To configure data validation settings, use the Data Validation dialog, which can be invoked by clicking the Data Validation button and selecting the Data Validation item in the drop-down menu.
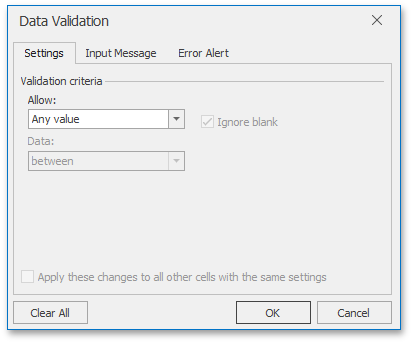
Select the action you wish to perform.
- Restrict data entry to predefined items from a drop-down list
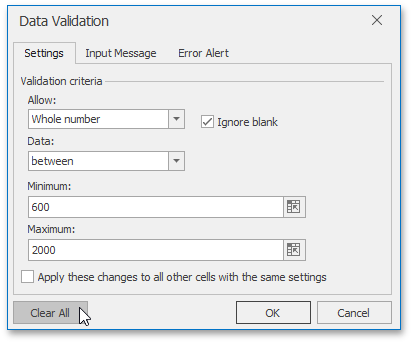
- Restrict data entry to a whole or decimal number within a specified range
- Restrict dates and times to values within a certain time interval
- Limit the number of text characters
- Validate data based on formulas or values in other cells
- Create an input message
- Create an error message
- Circle invalid data
- Remove data validation
Restrict Data Entry to Predefined Items from a Drop-Down List
Select the cell or cell range you wish to validate.
Invoke the Data Validation dialog.
On the Settings tab, in the Allow list, select the List item.
Enter a reference to the list of valid entries in the Source box. You can use a list of comma-separated values, define a name for the cell range of valid entries, or select this cell range directly in the worksheet by using the Collapse Dialog button
 .
.If you use a defined name or cell reference, precede it with an equal sign (=).
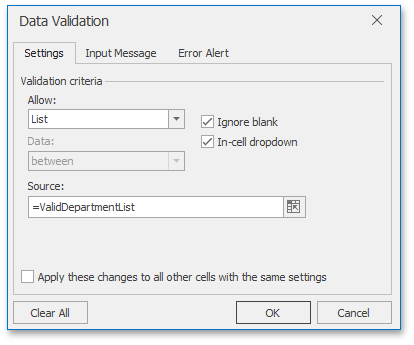
Verify that the In-cell dropdown check box is selected to display the drop-down menu in validated cells.
Select or clear the Ignore blank check box to specify whether or not to validate cells with empty values.
Click OK to close the dialog and apply the specified validation criterion.
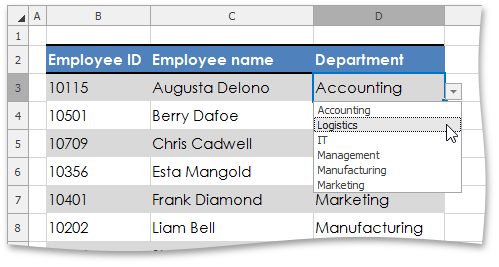
As a result, the drop-down arrow appears to the right of a validated cell. Click the arrow to display the cell's drop-down list and select the required value.
Restrict Data Entry to a Whole or Decimal Number within a Specified Range
Select the cell or cell range you wish to validate.
Invoke the Data Validation dialog.
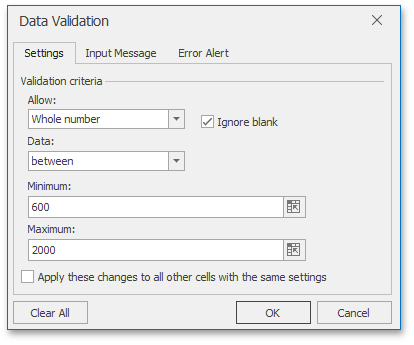
On the Settings tab, in the Allow list, select the Whole number or Decimal item.
Select the desired comparison operator in the Data list.
Depending on the selected operator, enter the required threshold values in the Minimum, Maximum or Value boxes. Note that you can also use a formula that returns a numeric value to calculate the threshold value. If you enter a formula, start it with an equal sign (=).
Click OK to close the dialog and apply the specified validation criterion.
Restrict Dates and Times to Values within a Certain Time Interval
Select the cell or cell range you wish to validate.
Invoke the Data Validation dialog.
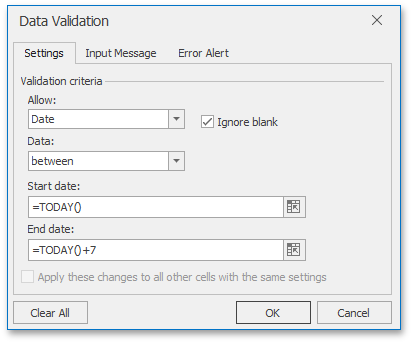
On the Settings tab, in the Allow list, select the Date or Time item.
Select the desired comparison operator in the Data list.
Depending on the selected operator, provide the required values for the Start date, End date or Date boxes, if the Date option is selected (or for the Start time, End time or Time boxes in case of the Time option). Note that you can also use a formula that returns a date or time value to calculate the threshold value. If you enter a formula, start it with an equal sign (=).
Click OK to close the dialog and apply the specified validation criterion.
Limit the Number of Text Characters
Select the cell or cell range you wish to validate.
Invoke the Data Validation dialog.
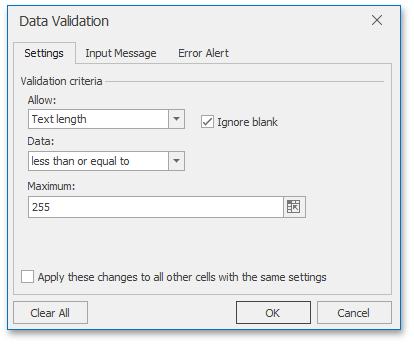
On the Settings tab, in the Allow list, select the Text length item.
Select the desired comparison operator in the Data list.
Depending on the selected operator, enter the minimum, maximum, or particular text length in the Minimum, Maximum or Length boxes, respectively. Note that you can also use a formula that returns a numeric value to specify the allowable text length. If you enter a formula, start it with an equal sign (=).
Click OK to close the dialog and apply the specified validation criterion.
Validate Data Based on Formulas or Values in Other Cells
Select the cell or cell range you wish to validate.
Invoke the Data Validation dialog.
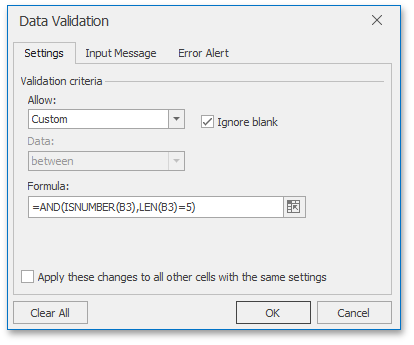
On the Settings tab, in the Allow list, select the Custom item.
In the Formula box, enter a formula you wish to use as a validation criterion. Note that this formula should return a logical value: TRUE for valid values and FALSE for incorrect values. Your formula may also contain cell references, so that you can calculate the allowable values based on the content of other cells.
For example, to restrict data entry for an Employee ID to a five-digit number, use the following formula: =AND(ISNUMBER(B3),LEN(B3)=5).
Click OK to close the dialog and apply the specified validation criterion.
Create an Input Message
Once you apply data validation to cells, you can create an input message, which represents a descriptive message explaining what values can be entered into validated cells. Each time a validated cell is selected, a yellow text box appears near the cell displaying the input message.
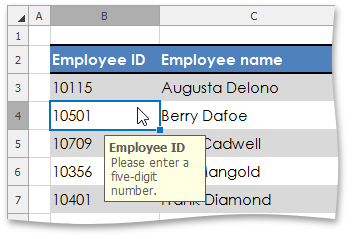
To create an input message, do the following.
Invoke the Data Validation dialog.
Switch to the Input Message tab.
Verify that the Show input message when cell is selected check box is selected.
Specify the message title in the Title box, and enter the detailed message text in the Input Message box.
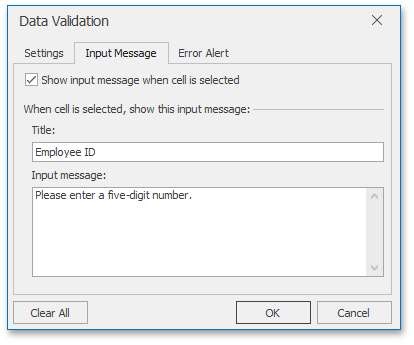
Click OK to close the dialog and add the specified input message to validated cells.
Create an Error Message
In addition to an input message, you can also specify an error message that will be displayed when a user enters an incorrect value into a validated cell.
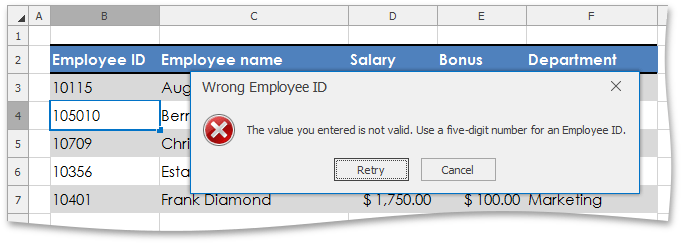
There are three types of error messages.
- Stop - specifies that users are not allowed to enter invalid data in a validated cell. The Stop message contains two buttons: the Retry button enables users to edit the invalid entry, while the Cancel button rejects it and rolls back to the previous cell value.
- Warning - allows users to enter an incorrect value in a validated cell, but warns them that the specified value is invalid. The Warning message contains three buttons: clicking Yes allows users to accept the invalid value, No enables them to edit the invalid entry, and Cancel rolls back to the previous cell value.
- Information - informs users that they entered an incorrect value and allows them to accept this value by clicking OK, or reject it by clicking Cancel.
Unless you specify the error message, the Spreadsheet will use the Stop error alert with the default text. To customize the error text and provide other users with a more informative message, do the following.
Invoke the Data Validation dialog.
Switch to the Error Alert tab.
Verify that the Show error alert after invalid data is entered check box is selected.
Select the type of the error message in the Style list.
Specify the caption for the error alert window in the Title box, and enter the error description in the Error Message box.
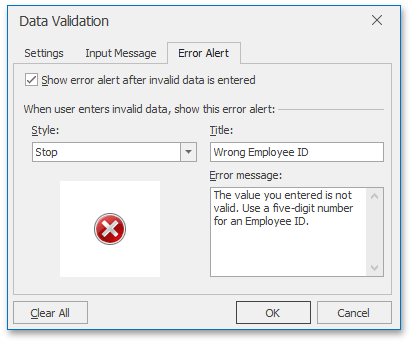
Click OK to close the dialog.
Note that if you use error messages that do not prevent the entry of incorrect values (Warning or Information), you can identify invalid data in your document by displaying validation circles.
Circle Invalid Data
The Spreadsheet allows you to highlight invalid values entered into validated cells. To do this, on the Data tab, in the Data Tools group, click Data Validation | Circle Invalid Data.
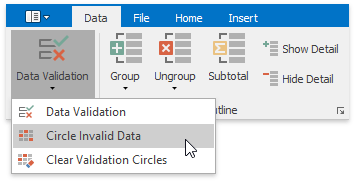
As a result, red circles will appear around cells containing incorrect values.
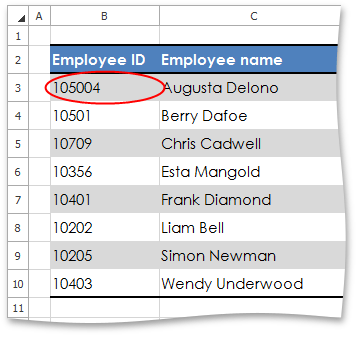
Once you identified invalid values, you can hide validation circles again. Do one of the following.
- Enter a value that meets the validation criterion in the cell. In this case, the validation circle will disappear automatically.
- On the Data tab, in the Data Tools group, click Data Validation | Clear Validation Circles.
Remove Data Validation
To remove data validation criteria, perform the steps below.
Select the cells which you wish to stop validating.
Tip
To quickly select all cells to which data validation is applied, on the Home tab, in the Editing group, click Find & Select | Data Validation.
Invoke the Data Validation dialog.
Do one of the following.
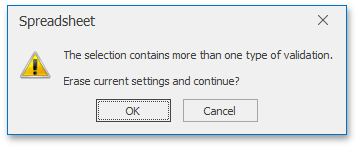
If you are prompted to erase current validation settings and continue, click OK, and then click OK in the invoked Data Validation dialog.
In the invoked Data Validation dialog, on the Settings tab, click the Clear All button.
