Print a Workbook
This document includes the following sections:
- Preview a Workbook before Printing
- Print a Workbook
- Print a Workbook Using the Default Settings
- Print Gridlines and Headings
- Print Comments
- Change Print Resolution and Quality
- Set a Print Area
- Set Print Titles
- Add Headers and Footers to a Worksheet Printout
Preview a Workbook Before Printing
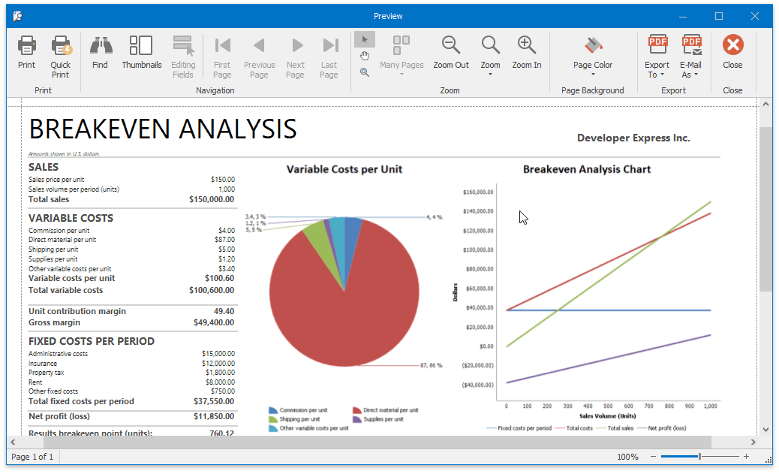
To view your workbook as it will be printed, select the File tab and click the Print Preview button in the Common group.

At the bottom of the Preview window, the Spreadsheet indicates how many pages the workbook will require when printed, and the number of the page you are currently viewing.
Print a Workbook
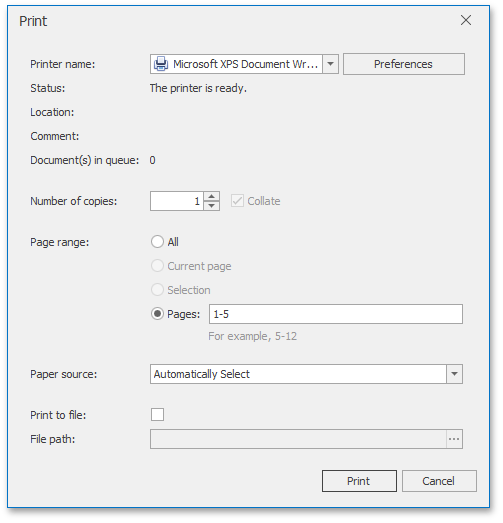
To print a document, click the Print button in the Common group or press CTRL+P.

In the invoked Print dialog box, specify the required settings and click Print.
Print a Workbook Using the Default Settings
To send a workbook directly to the default printer without setting print options, click the Quick Print button in the Common group.

Print Gridlines and Headings
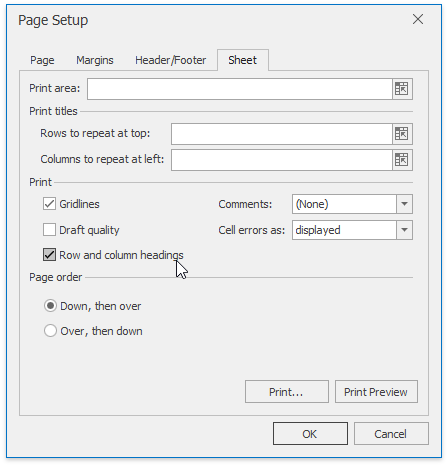
To print worksheet gridlines or row/column headings, on the Page Layout tab, in the Print group, check the Gridlines and Headings boxes...
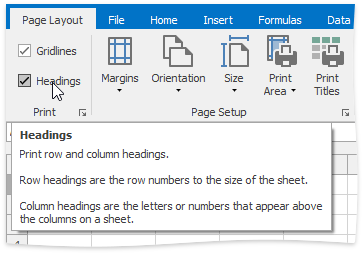
...or click the Dialog Box Launcher. In the invoked Sheet tab of the Page Layout dialog, check the Gridlines and Row and column headings boxes.
Print Comments
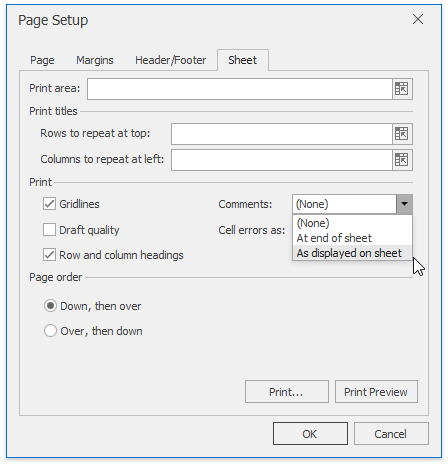
The SpreadsheetControl doesn't print comments by default. To enable printing comments, do the following.
On the Page Layout tab, in the Print group, click the Dialog Box Launcher.
In the invoked Sheet tab of the Page Setup dialog, click the Comments drop-down menu and select As displayed on sheet. To print the comments on a separate sheet of paper, select At end of sheet.
Change Print Resolution and Quality
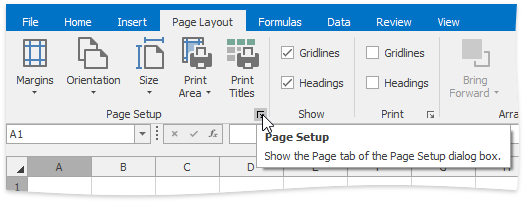
Depending on the used printer, you can change the resolution settings to a lower or higher dpi (dots-per-inches) setting. Invoke the Page Setup dialog by clicking the Dialog Box Launcher in the Page Setup group.
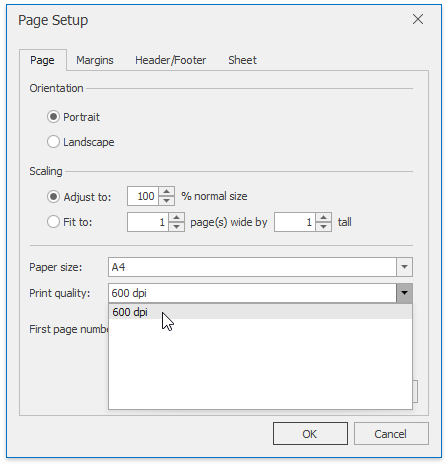
On the Page tab, select the desired resolution from the Print Quality box.
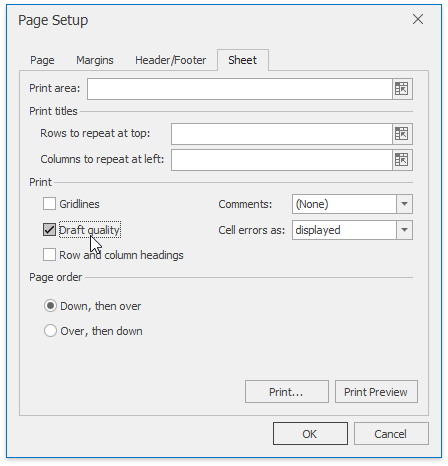
Additionally, you can print your worksheet without graphics (this is useful when it is necessary to accelerate printing and save toner). To do that, switch to the Sheet tab and check Draft quality box.
Set a Print Area
If you need to print only a specific part of the worksheet, you can define the target cell range as a print area. To do that, do the following:
Select the cells you wish to print.
On the Page Layout tab, in the Page Setup group, click the Print Area button and select Set Print Area in the invoked drop-down menu.
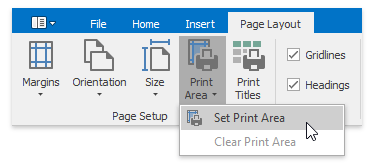
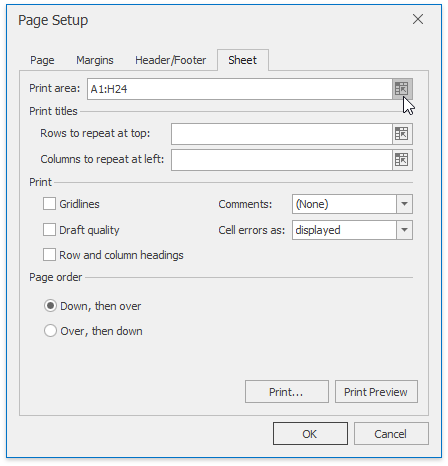
... or click the Page Setup box launcher to invoke the Page Setup dialog, switch to the Sheet tab and specify the print area in the Print area box. You can type the cell reference or define the range directly in a worksheet by clicking the Collapse Dialog
 button.
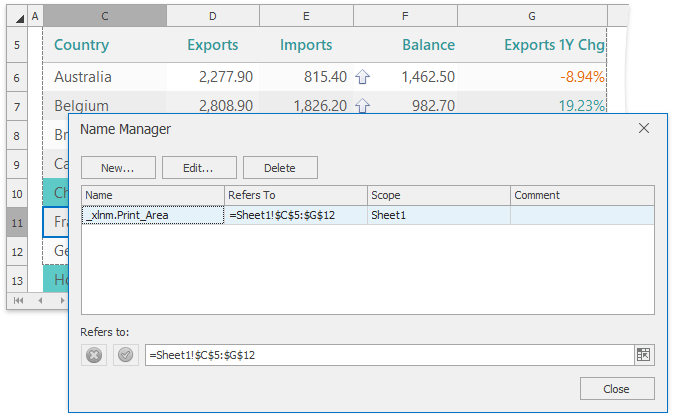
When you specify the print area, the cell range that it comprises gets a thin dashed outline and the _xlnm.Print_Area name is added to the collection of the defined names contained in the workbook.
To extend the print area, select the select the cell range you wish to add and click Print Area | Add to Print Area in the Page Setup group. Note that if the print area consists of non-adjacent cell ranges, each range will be printed as a separate page.
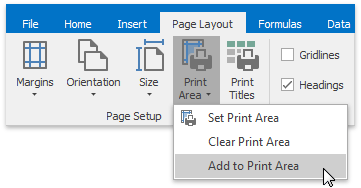
To clear the print area and print the entire worksheet, on the Page Layout tab, in the Page Setup group, click Print Area | Clear Print Area.
Set Print Titles
If a worksheet occupies more than one page, you can repeat specific row or column (print titles) on every printed page to make the document easier to read. To define print titles, follow the steps below.
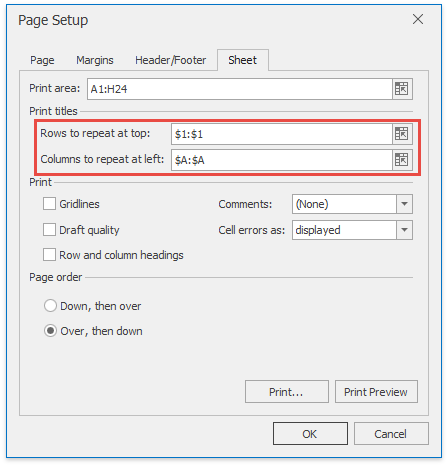
On the Page Layout tab, in the Page Setup group, click the Print Titles button...

... or to invoke the Page Setup dialog and switch to the Sheet tab.

Specify the reference to the row/column containing labels that should be repeated in the Rows to repeat at top and/or Columns to repeat at left boxes of the Print titles section. You can select the target row or column directly in a worksheet by clicking the collapse dialog
 button.
Add Headers and Footers to a Worksheet Printout
You can set a header and footer for a worksheet printout by doing the following.
On the Page Layout tab, in the Page Setup group, click the Page Setup box launcher.

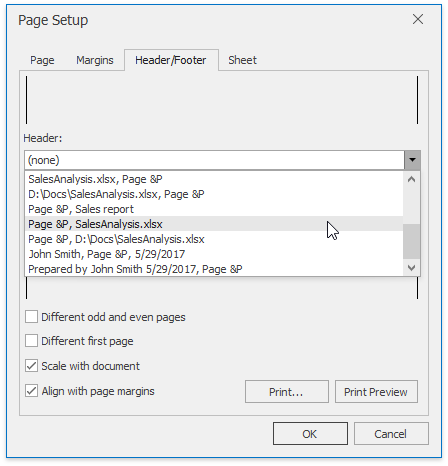
In the invoked Page Setup dialog, switch to the Header/Footer tab.
Select one of the predefined options in the Header or Footer drop-down list.
To specify custom header and/or footer, click the Custom Header/Footer... button to invoke the Header and Footer dialog.
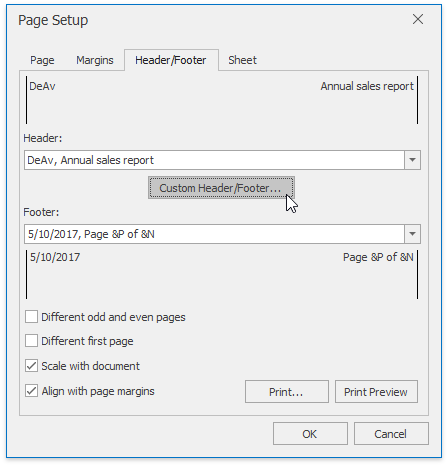
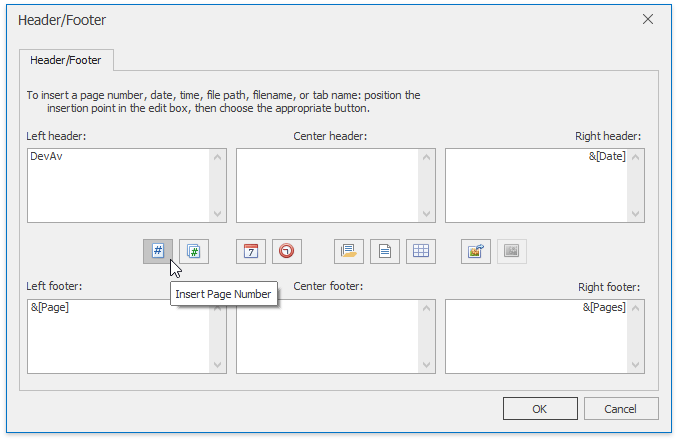
Click in the Left, Center or Right section box and type the desired text. Use the buttons located between the header and footer sections to insert specific codes that enable including dynamic information into a header or footer, such as a page number, current date and time, filename, worksheet name, etc.
To insert a picture to the worksheet header or footer, click the Insert Picture
 button and select the desired file in the invoked Open dialog. To format the image so it fits the header/footer area, click the Format Picture
 button.